Satellites
Introduction
With the Bloonix satellite, you have the option of distributing the monitoring and checking of the availability of Internet services to locations around the globe. This is exciting, for example, if your website has an international Internet presence and you want to know what loading times your visitors from other countries have.

Installation
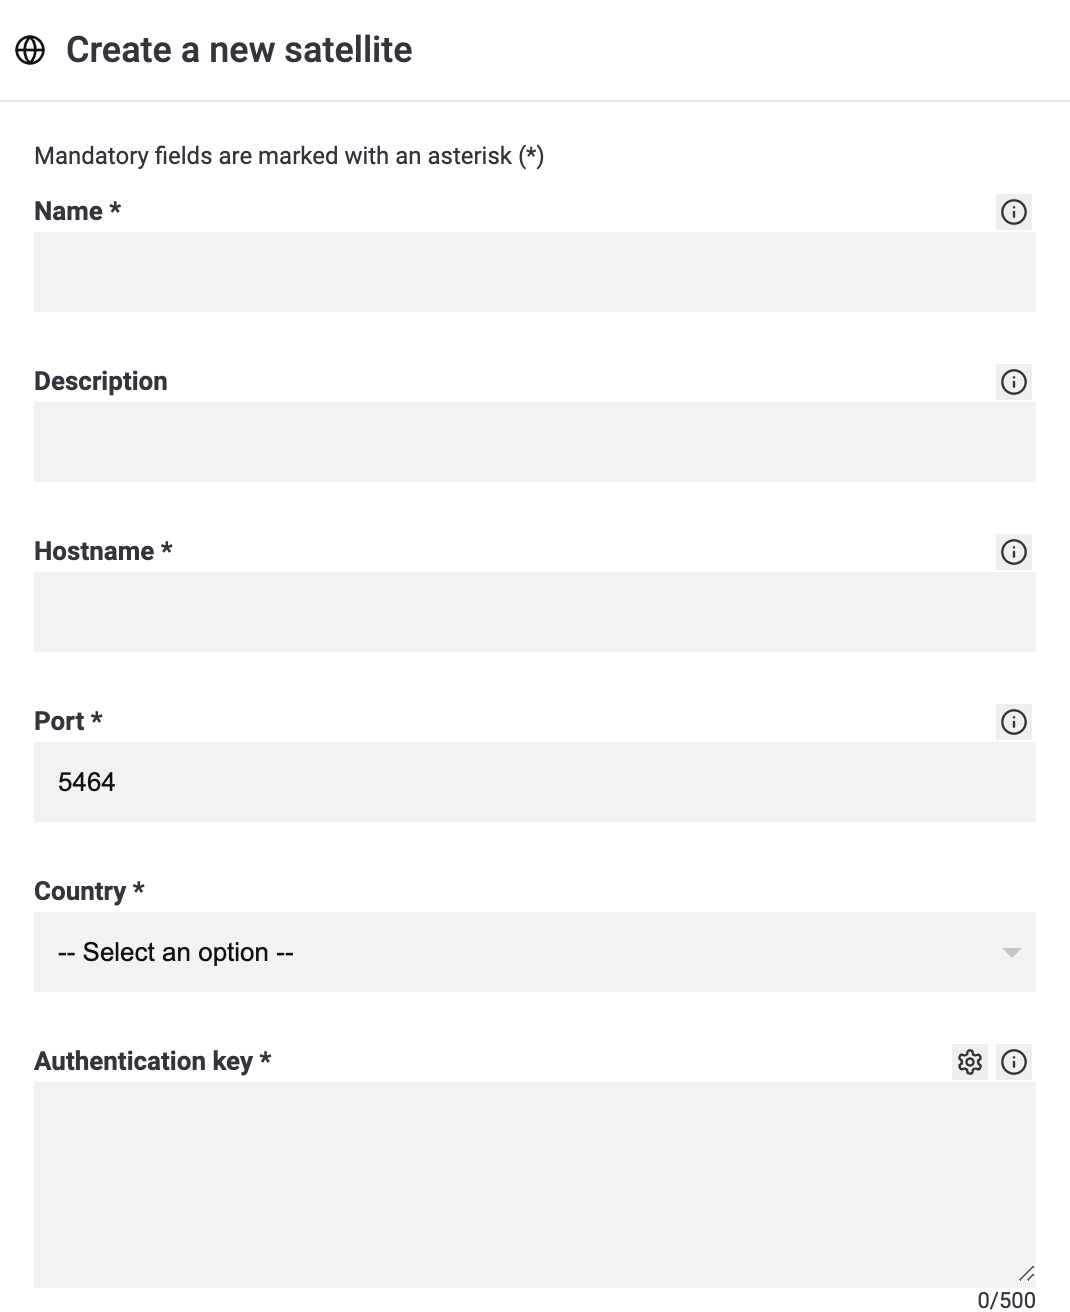
Setting up a satellite begins in the WebGUI. There you create a new satellite with an authentication key.
Now install the Bloonix satellite on the server from which you want to monitor the services. To do this, set up the corresponding repository of the Linux distribution of your choice and install the package bloonix-satellite.
Example Debian
apt-get install bloonix-satelliteExample Rocky Linux
dnf install bloonix-satelliteOnce the Bloonix Satellite is installed, you only need to enter the authentication key from the WebGUI into the satellite’s configuration file. The file is /etc/bloonix/satellite/main.conf. The parameter is authkey.
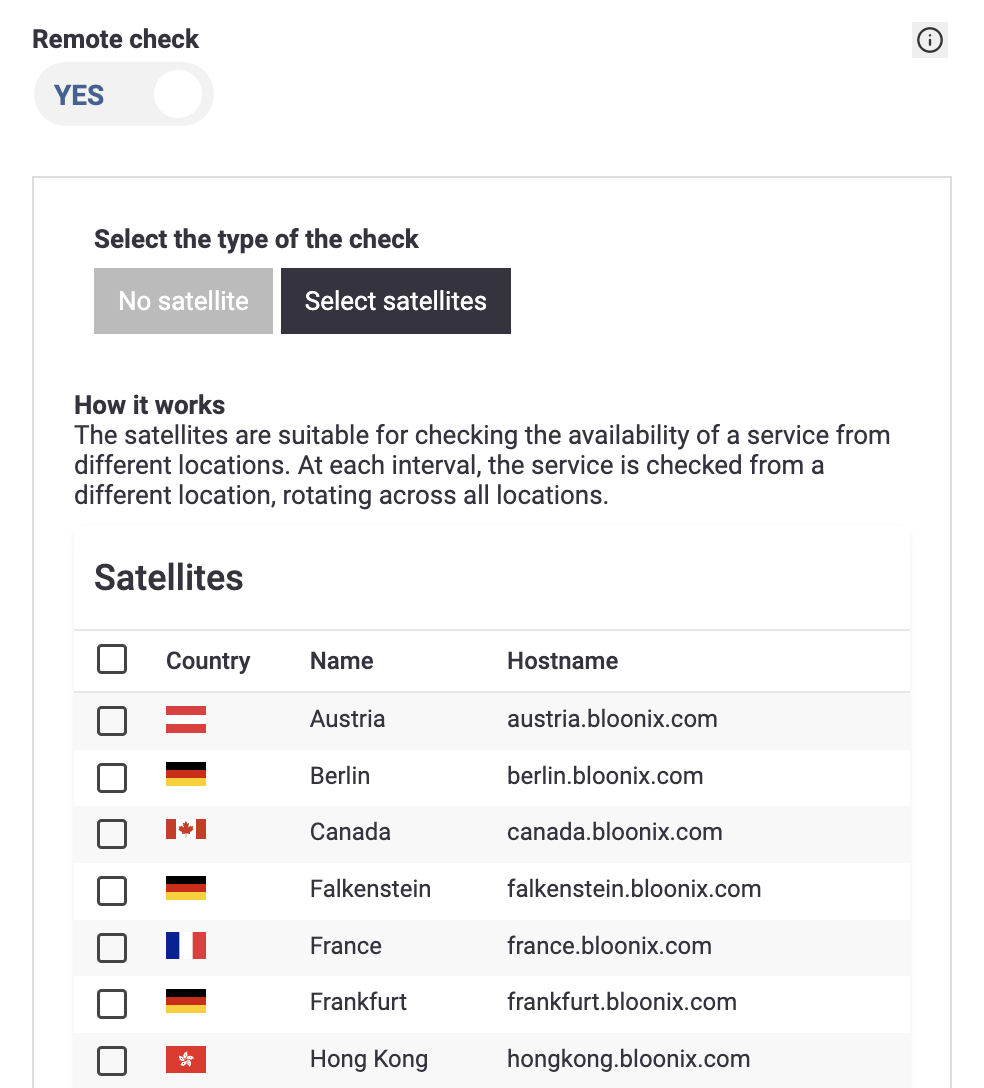
After this, you just need to restart the satellite and you can start monitoring services via the satellite. In the WebGUI, there is a separate form for selecting satellites for the corresponding services:
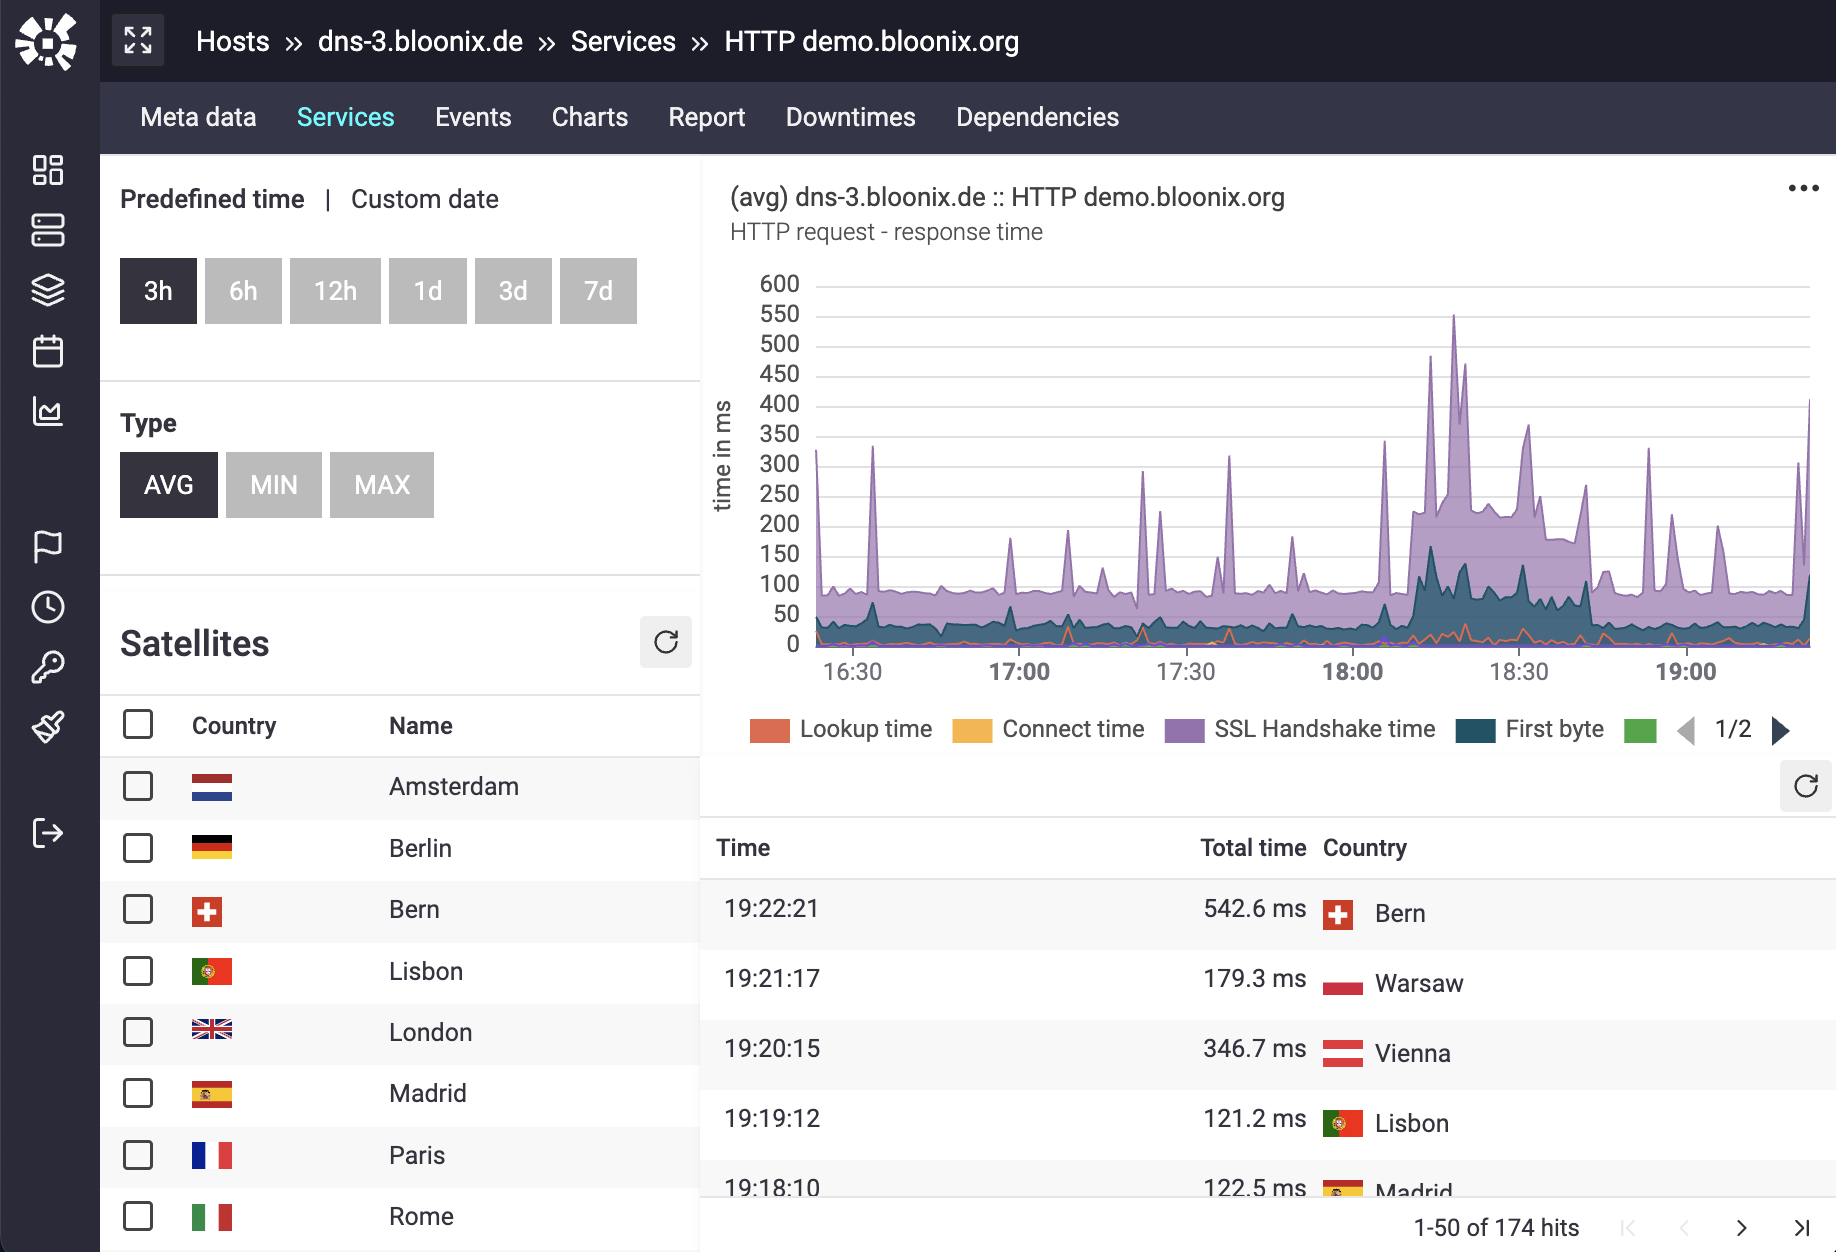
Once monitoring has started, you can click on the service’s dashboard and examine the satellite response times by location and also filter by location: