Service Monitoring
Introduction
In this document we want to explain the basics of setting up hosts and services, including how to configure a host in relation to the Bloonix agent.
What is a host and what is a service?
First, it is useful to explain the terms Host and Service, because you will come across these terms again and again in the documentation.
What is a host?
A host is a meta object in Bloonix and can be anything, for example a server, a virtual machine, a router, a switch, even an air conditioning system or simply a service IP that can switch between servers in a cluster via Keepalived. In other words, a host is an object with an IP address and is part of a network. In the WebGUI, hosts are always set up with a hostname, an IP address and a password. The password is only needed later for the Bloonix agent.
What is a service?
A service is often referred to as a check or service check. There is always a plugin behind a service that is configured in the WebGUI. Plugins are small scripts that are used to check the status of services. These plugins are used to check, for example, the CPU load, the availability of a database or a port on routers.
When we talk about services, we mean the services that are set up in the WebGUI. When we talk about plugins, we mean the scripts that are executed to check a service.
Setting up a host
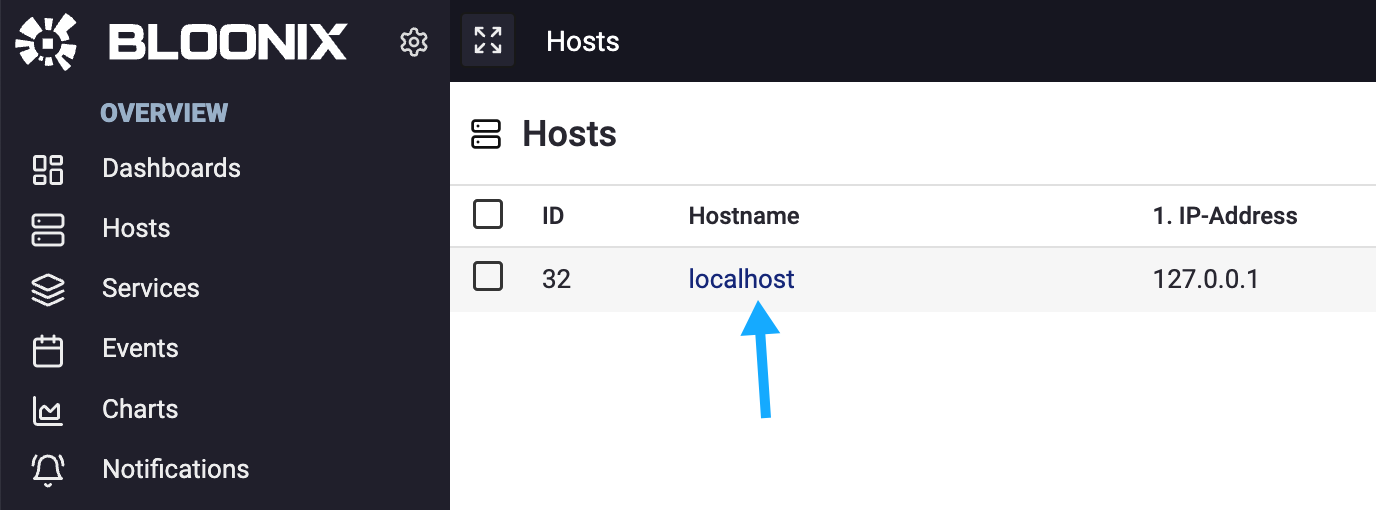
Let’s start by setting up a host in the WebGUI. Preferably, the host should be a server or virtual machine with Linux as operating system and with the Bloonix agent already installed. This way, we can complete the configuration of the host directly on the server with the Bloonix agent.
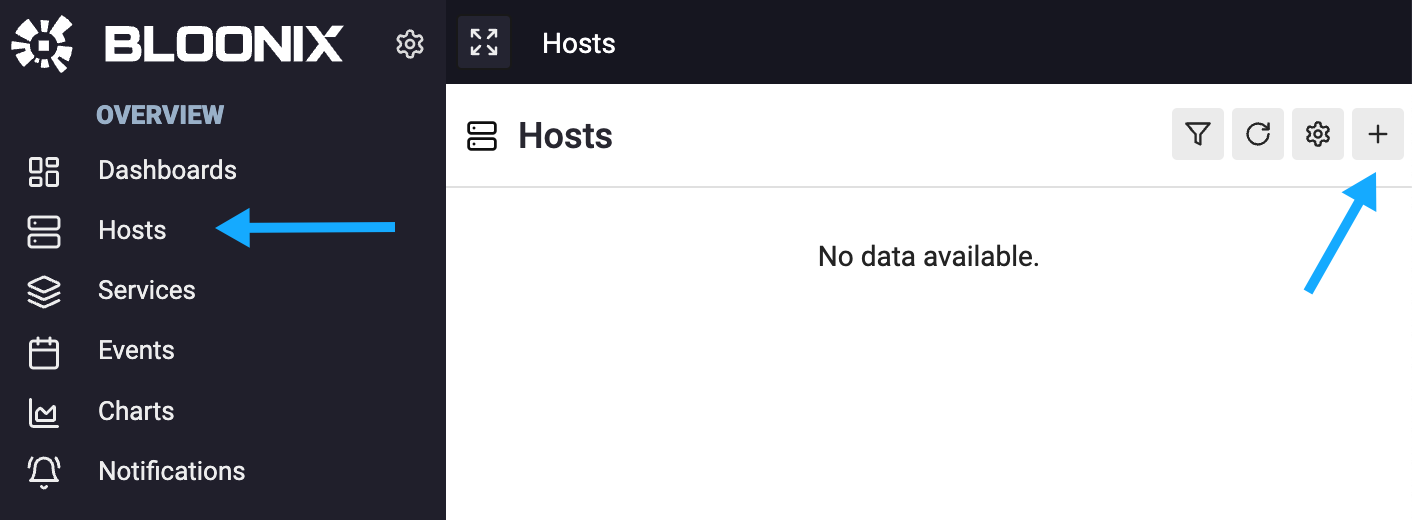
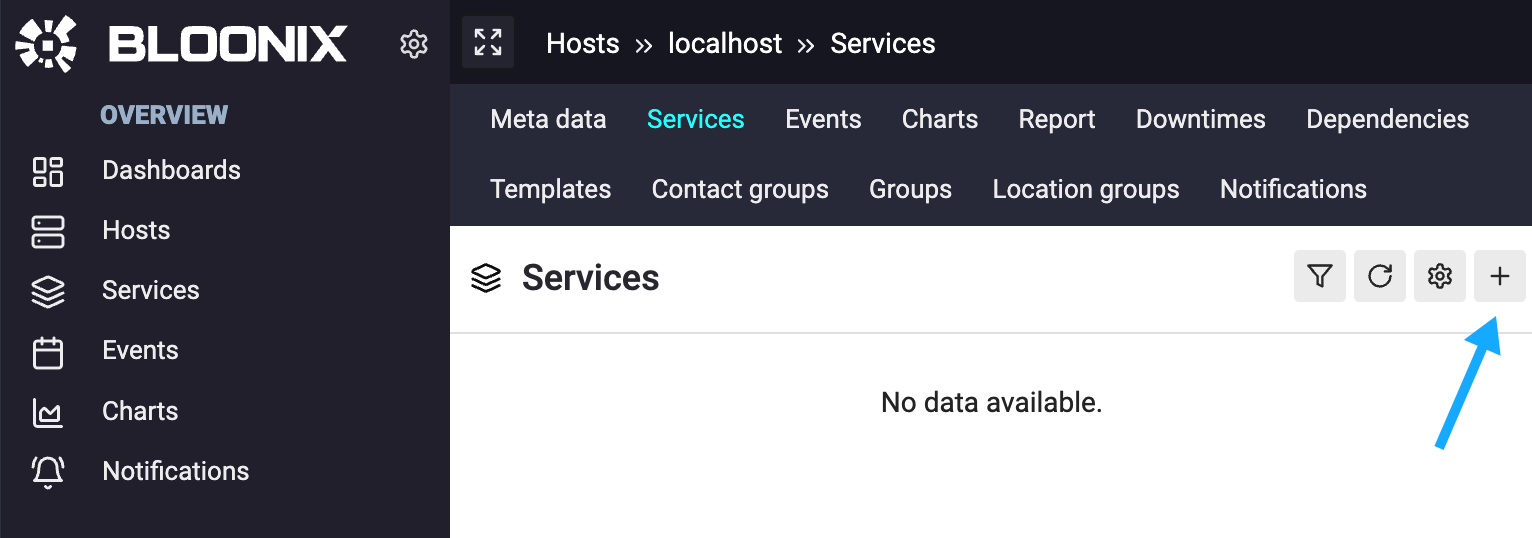
As shown in the graphic, click on the menu item Hosts and then on the plus sign.
After the host setup form has been filled out and submitted, information appears at the end that is important for setting up the Bloonix agent. This looks like this, for example:

Note: the hostname of the Bloonix server, here called bloonix-server.example, can be adjusted in the system settings using the parameter Bloonix Server Hostnames.
Please also note that the host ID, password and hostname of the Bloonix server are only examples.
Now there are two ways to set up the Bloonix agent, manually and via the bloonix-init-host script.
Manual setup of the Bloonix agent
When setting up manually, two files must be edited:
- /etc/bloonix/agent/main.conf
- /etc/bloonix/agent/conf.d/host.conf
The address of the Bloonix server must be entered in the file /etc/bloonix/agent/main.conf. The entry is made in the section server and the parameter host contained therein:
server {
    host 127.0.0.1
    host bloonix-server.example
Next, the host ID and password are entered in the file /etc/bloonix/agent/conf.d/host.conf:
host {
    host_id 33
    password GOkUm91qvpjq388N8mWJdjHiQrkA4WCrjFyweLm3
}
Once all adjustments have been made, the final step is to restart the Bloonix agent for the changes to take effect.
Automatic setup of the Bloonix agent
The entire setup can also be done using the bloonix-init-host script, as shown in the example graphic. The prerequisite for this is that the agent’s configuration file is in its original state or that at least the line host 127.0.0.1 is found in the server section.
bloonix-init-host \
    --host-id 33 \
    --password GOkUm91qvpjq388N8mWJdjHiQrkA4WCrjFyweLm3 \
    --server bloonix-server.example
Setting up services
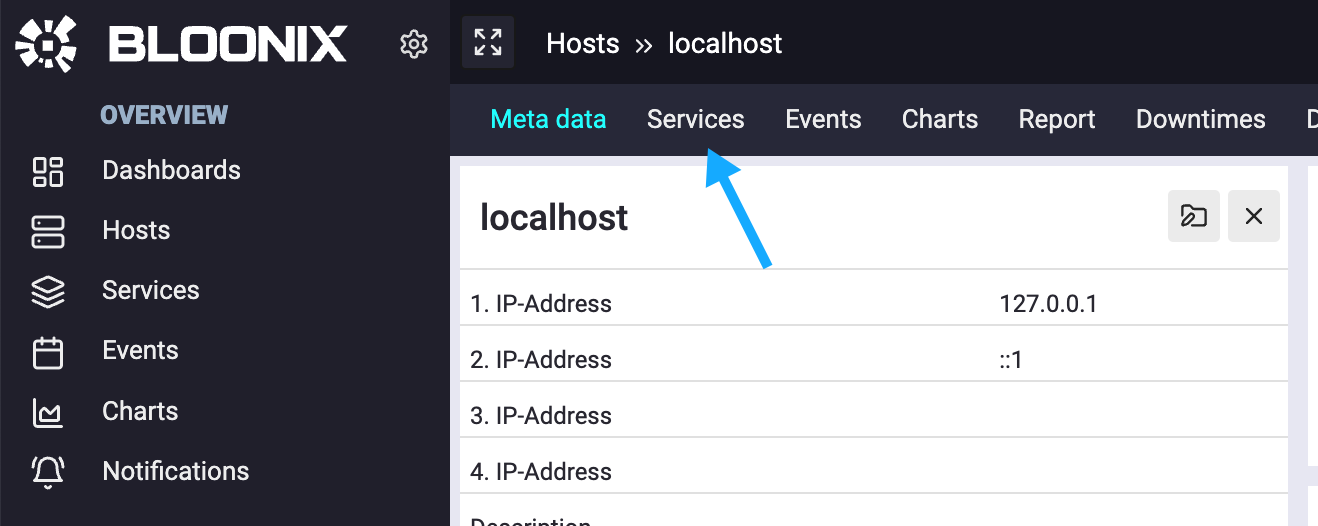
Once the host is set up, the services can now be added. To do this, click through the menus as shown in the following graphics.
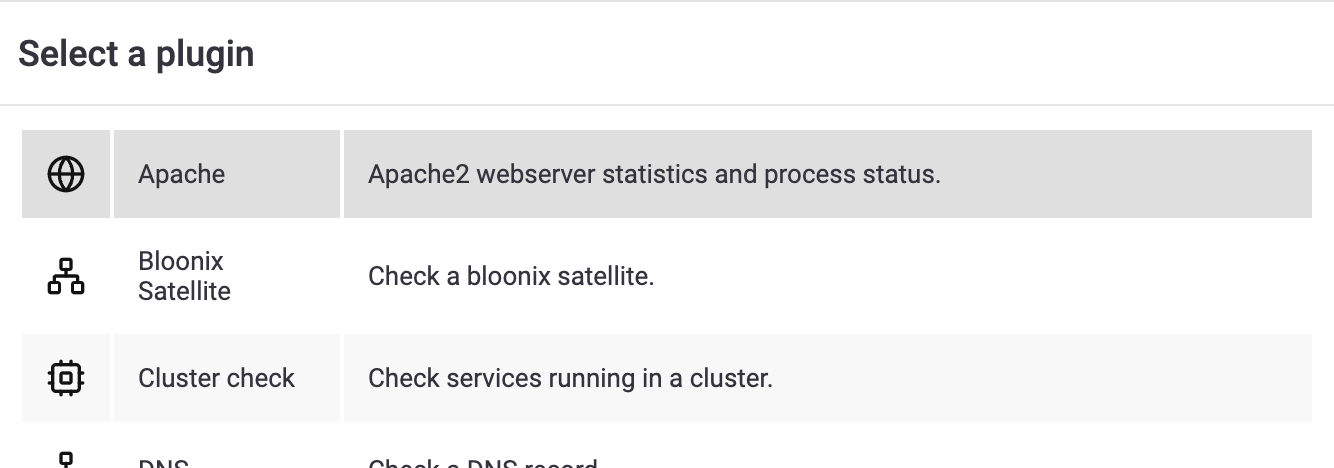
Select a plugin with which you want to check the server on which the agent is running. This could be, for example, a CPU check that checks the load on the server.
If the option Remote check is included when setting up the service, please leave the parameter deactivated:
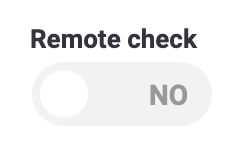
The exact meaning of this option is described in the document Local, Remote, Satellite.
Interaction between Bloonix server and Bloonix agent
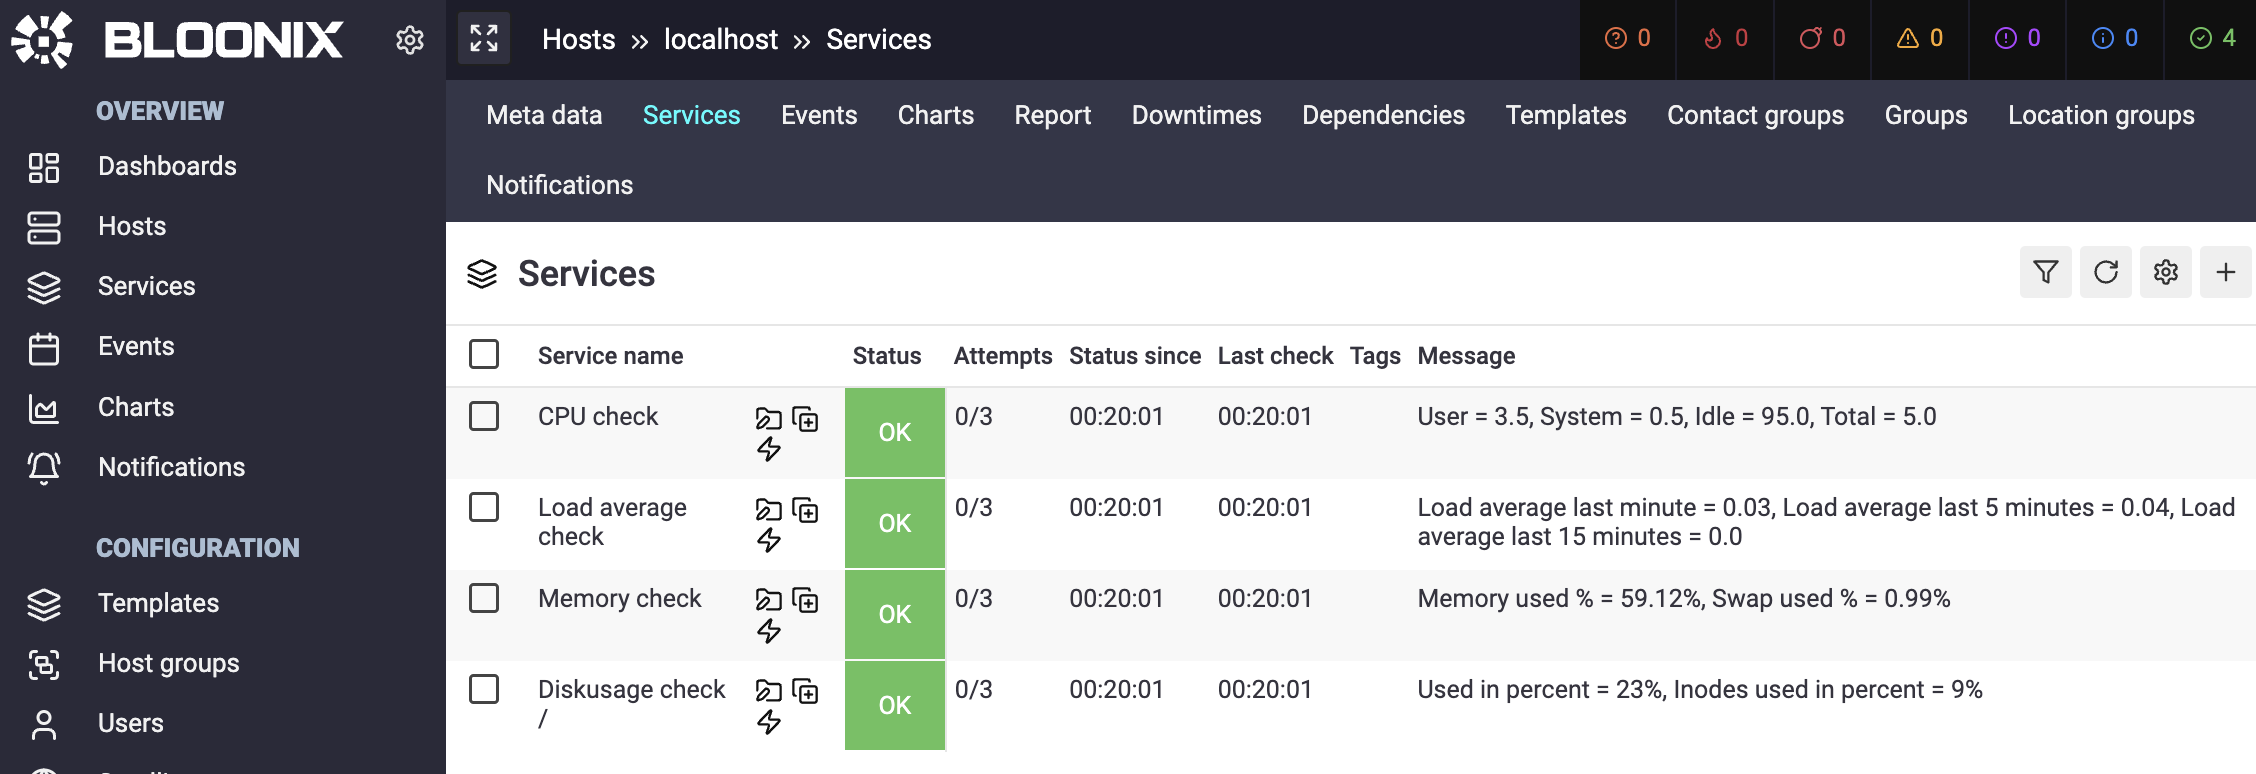
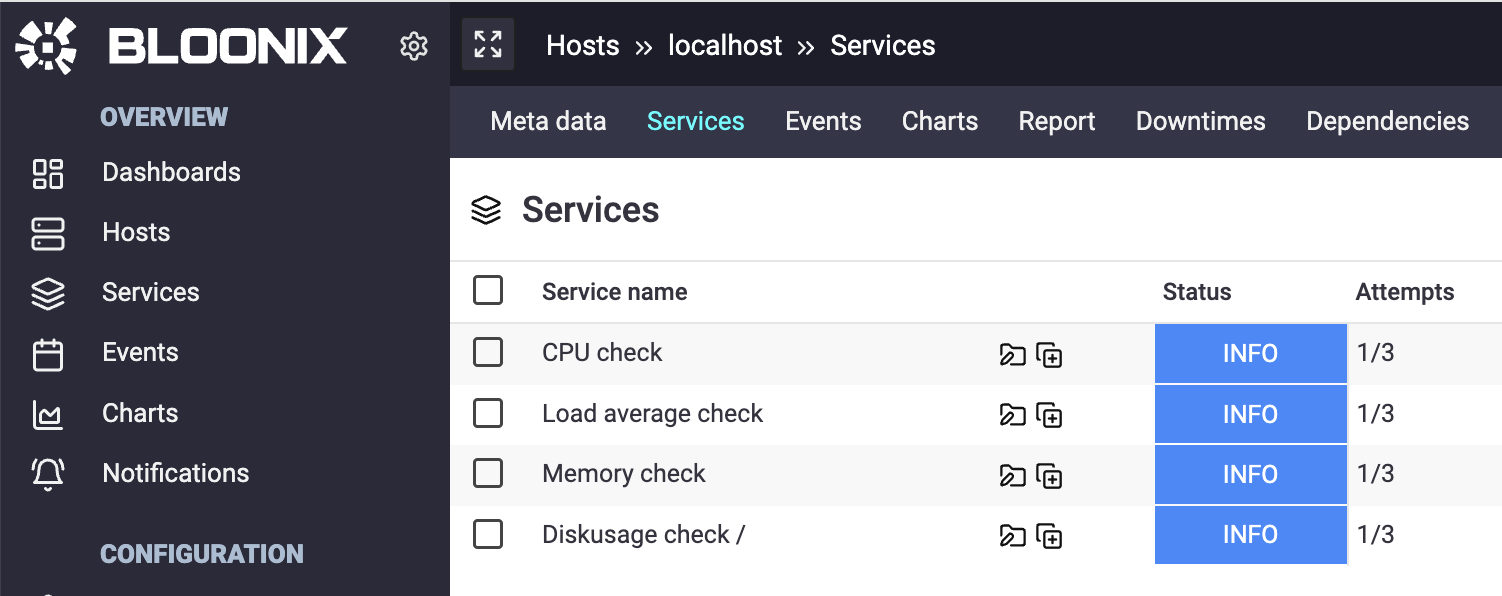
After setting up the services, they initially have the status INFO because the services have not yet been checked:
The agent can now start monitoring the services. To do this, the agent connects to the server and transmits the host ID and password to authenticate itself. On request, the server sends the agent the services that were set up for the host in the WebGUI so that the agent can carry out the appropriate checks on the server.
After the check, the agent reconnects to the Bloonix server to transmit the status and metrics of the services. In the WebGUI it is then possible to view the current status of the services: